Pages

Monday, May 14, 2012

Model Magic "Colorpillars"


First graders created these adorable "colorpillars" for their color mixing lesson in October. It worked pretty well, but in the future I think I will do this lesson either later in the year with first grade or with second graders- the directions got a little overwhelming for some of them.
Here's how we made them:
1. Give students 1/6 of a packet of red, yellow, and blue model magic (a little larger than a grape) Give each student a small color wheel to organize their balls of color.
2. Break each ball of model magic into four pieces.
3. Roll three of these pieces into balls and place in the primary color position.
4. Mix primary colors and place on the color wheel.
5. Working around the color wheel step by step together, mix remaining pieces into the intermediate colors.
6. Take the balls off the color wheel and make a line.
7. Press the pieces together firmly and into bend into a caterpillar shape. Glue onto mat board.
8. Use a piece of Twistees for the antennae.
Posted by Picasa

Form: Model Magic Birds


This lesson is a good example of thinking about what you need to teach, how long you can spend on the lesson, and what supplies you have on hand! I needed a quick lesson on form for kindergarten so we whipped these silly little birds up. Before we sat down, we talked about shapes(2D) vs. forms(3D). We looked at some images to help with recognizing and naming different shapes & forms. While I passed out the model magic, students were challenged to make different forms as soon as they got thiers- cubes, cones, cylinders & spheres. Once all students had their model magic, we practiced our clay vocabulary and rolled a coil. Then, we used a little washable marker to create the swirled colors on the body of the bird. Twistees make the legs, pipe cleaners for the neck and head, and colorful feathers, well, for the feathers. Little hot glue and we were good to go. Kindergartners LOVED these little guys.


Mixed Media Snowy Owl


First and second graders made these cute snowy owls before winter break. We were learning about neutral colors and I wanted something seasonal as well. I liked how they turned out, although if we make them again I'll have to think of how to get better contrast between the owl and the background... They were a pretty big hit though!


Thank You Card For City Hall


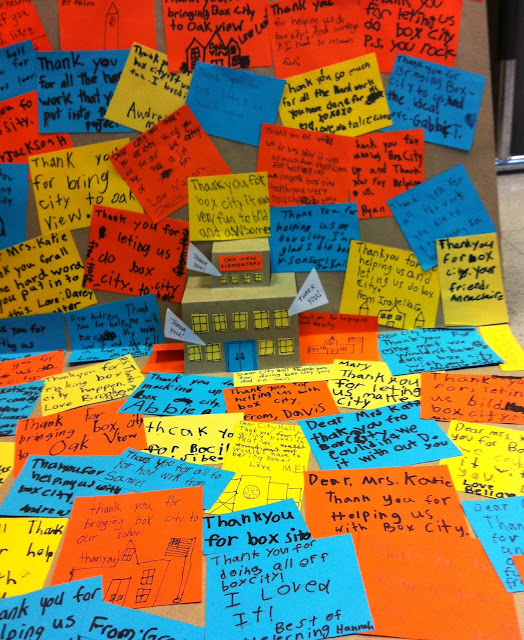
To thank City Hall for bringing us Box City (see previous post) second graders put together a fancy pop-up card. We had so much fun building our"Oakville" and genuinely appreciated their hard work making it happen.

Box City


The local city hall was kind enough to display one of our group sculptures last summer. Through that opportunity, we decided to work together this past school year to bring a really fun opportunity to our second grade students. Students in second grade were studying how cities changed over time. City Hall workers came during their social studies time and presented some photographs of how our city changed over time. They talked about city zoning and important buildings every city needs.With me in art class, students built milk carton houses. The next week, they worked in groups to create buildings every city needs. We all came together during second grade specials to build our city. It was a great opportunity- it was even featured in our local news!


Thursday, May 3, 2012

Expressionist Chairs

This turned out to be one of my favorite projects all year. For this lesson, third grade was studying at the art movement of the Expressionism.
Day 1: We looked at some of Vincent van Gogh's paintings as an example of how Expressionists painted not only visible subject matter, but are also conveying emotion and or/moods when they paint. We zeroed in on the paintings of Vincent's and Gauguin's chairs by Vincent van Gogh. (read about and see the two paintings here: http://www.vggallery.com/painting/p_0498_0499.htm). We discussed the relationship of these two artists and discussed the emotions, personalities, and moods we observed as we compared and contrasted the two paintings. Students then decided and brainstormed what they (or someone they knew very well) would look like as a chair. They drew practice sketches.
Day 2: Complete brainstorm drawings and get right on to drawing on black construction paper with a white charcoal pencil (we traced a template for the seat of the chair to get started). Move on to oil pastels/chalk pastels if time permits.
Day 3: With oil pastels, trace and fill in the chair with expressive lines. Use oil pastels to fill in textures on the floor- keeping in mind that even the type of floor is part of the "expressing". Use chalk to fill in the walls- one light and one dark for contrast.


Wednesday, May 2, 2012

One Point Perspective Trees


It was past time to introduce my fourth graders to drawing in one-point perspective so we did these wonderful drawings in chalk.
Day 1: We used recycled paper- looks like a brown paper bag (I forget what its officially called) Very lightly in pencil, draw horizon line, vanishing point, lines of perspective & tree trunks (don't let them leeeeean!).
Day 2: Lightly start to add chalk in the sky & clouds, tree tops, trunks, ground between tree trunks, and finally road. Blend colors together and add lines for texture.


 LOVE how they turned out!! So impressed with my fourth graders!